 Electro
18650 Battery Safety and the TP4056 Charger Module
Use 18650 lithium-ion cells safely in student projects and wire a TP4056 charger correctly: protected cells, holders, B+ vs OUT pads, one cell only, and warning signs.
On this page
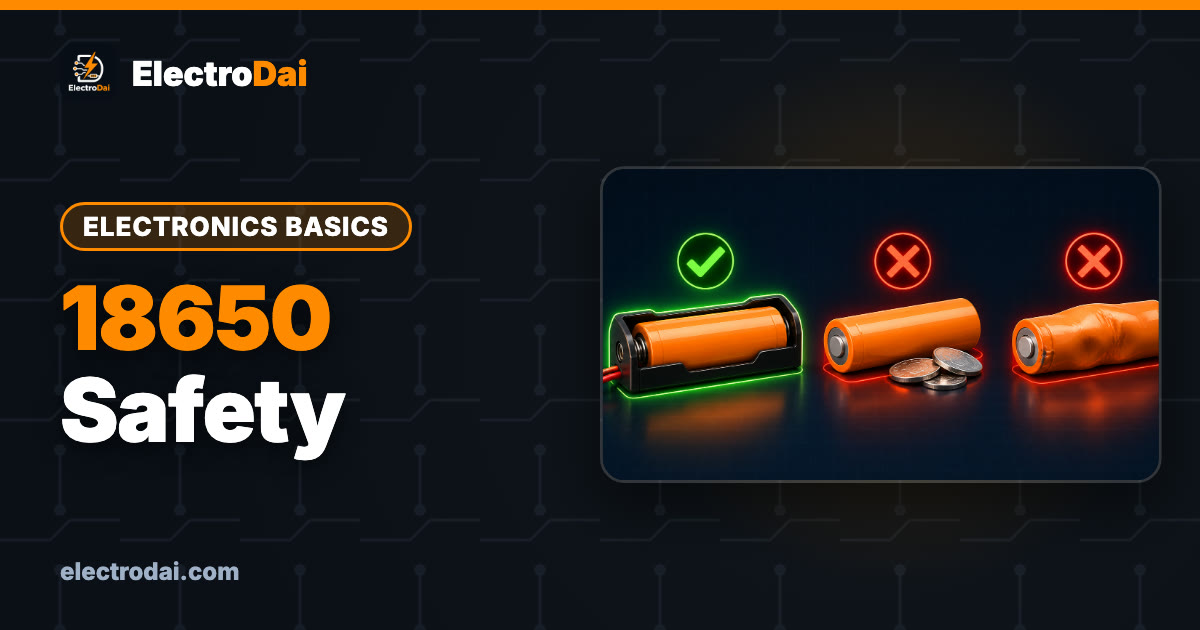
The 18650 is the battery inside many laptop packs, power banks and torches, and it has become the default power source for student robots and IoT nodes. It is rechargeable, it can supply high current, and it stores a lot of energy in a small cylinder.
That last point is why it deserves respect. A lithium-ion cell that is shorted, punctured, overcharged or damaged can get extremely hot, vent smoke and catch fire. Used correctly, 18650 cells are safe enough to sit in millions of devices. Used carelessly on a project bench, they cause accidents.
This guide covers the safety rules for 18650 cells and how to use the small, common TP4056 charger module correctly.
18650 basics
Scroll sideways to see all columns.
| Property | Typical value | What it means |
|---|---|---|
| Size | 18 mm diameter, 65 mm long | Hence "18650" |
| Nominal voltage | About 3.6 V to 3.7 V | The average voltage during use |
| Full charge | 4.2 V (for common cells) | Never charge above this |
| Minimum discharge | Set by the cell's datasheet, often around 2.5 V to 3.0 V | Going lower damages the cell |
| Capacity | Printed in mAh | Check it against the cell's real datasheet |
Exact limits vary by cell model, so look up the datasheet for the cells you have.
Protected vs unprotected cells
A protected cell has a tiny circuit board built into the end of the cell. It cuts off the cell if it is overcharged, over-discharged, shorted or asked for too much current. Protected cells are usually a few millimetres longer than unprotected ones and may not fit every holder.
An unprotected cell has no such circuit and relies on the device (a battery management system, or BMS) to protect it.
For student projects, use protected cells, or use cells only through a protection board.
Safety rules for 18650 cells
- Never short the terminals. Do not carry loose cells in a pocket or bag with keys or coins. Use a plastic battery case.
- Use a proper holder with good springs, ideally with a switch. Never tape cells together for a "pack".
- Never solder directly onto a cell. The heat can damage it internally. Use holders, or ready-made packs with spot-welded strips.
- Inspect the wrap. The plastic sleeve insulates the metal can, which is connected to the negative terminal. A torn wrap near the positive end can cause a short. Do not use a cell with damaged wrap.
- Never use or charge a damaged cell. Dented, swollen, leaking, hissing, unusually hot or dropped-hard cells go to safe disposal, not back into a project.
- Charge with a proper lithium-ion charger that stops at 4.2 V. Never use a NiMH or lead-acid charger.
- Charge on a non-flammable surface, away from paper and fabric, and do not leave charging cells unattended or overnight.
- Do not mix cells. In a pack, use cells of the same model, age and charge level.
- Never connect cells in parallel at different voltages. Large currents flow between them instantly.
- Be careful with salvaged cells. Cells from old laptop packs may be worn out or damaged. Test them carefully or avoid them.
- Be suspicious of huge capacity claims. A label with an unrealistically high mAh number is a warning sign of a fake or recycled cell.
- Dispose of dead cells properly. Do not throw lithium cells in household waste or fire. Tape the terminals and ask about electronic waste collection where you live.
- Keep cells cool. Do not leave projects with lithium cells in a hot car or direct sun.
The TP4056 charger module
The TP4056 is a charger chip for one lithium-ion cell. It charges at a constant current, then holds the voltage at 4.2 V and lets the current fall until the cell is full. The common small blue modules take 5 V from a USB connector.
There are two common versions:
Scroll sideways to see all columns.
| Version | Pads | What it does |
|---|---|---|
| Basic (charger only) | IN+ / IN−, B+ / B− | Charges the cell. No protection for the load side |
| With protection (usually has extra chips beside the TP4056) | IN+ / IN−, B+ / B−, OUT+ / OUT− | Charges the cell, and protects it from over-discharge, overcurrent and short circuits on OUT |
Look at your module: if it has OUT+ and OUT− pads, it is normally the protected version.
B+ / B− vs OUT+ / OUT−
This is the most common wiring mistake.
Scroll sideways to see all columns.
| Pad | Connects to |
|---|---|
| USB connector or IN+ / IN− | 5 V supply (USB charger) |
| B+ | Cell positive (+) |
| B− | Cell negative (−) |
| OUT+ | Your load's positive (for example, a boost or regulator module input) |
| OUT− | Your load's negative |
- The cell connects to B+ and B−.
- Your project connects to OUT+ and OUT− on the protected version. That way the protection circuit can disconnect the load when the cell gets too low or something shorts.
- On the basic version there is no OUT. If you connect a load directly to the cell, nothing protects it from over-discharge, so you must add a protection board or use a protected cell.
Disconnect the project load while charging unless you add a separate power-path circuit. The protection on the OUT pads does not separate load current from charge current, so a connected load can interfere with charge termination.
Double-check polarity before you connect the cell. Reversing a lithium cell on a module can destroy the module instantly.
One cell only
The TP4056 charges one cell to 4.2 V. It cannot charge two cells in series (a 7.4 V pack). Doing that will never charge the pack correctly and is unsafe. For series packs, use a charger designed for that number of cells, with balancing.
You can charge cells in parallel (same voltage, same model, same charge level) as a single bigger cell, but for beginners, one cell per module is simplest.
Charge current and heat
The charge current is set by a resistor on the module. Many common modules are set to around 1 A. Check your module's listing or the resistor value against the TP4056 datasheet table. Some points to remember:
- The module gets warm during charging. This is normal; the chip reduces current if it gets too hot.
- Your USB source must supply the current. A weak port charges slowly.
- For small cells (not 18650s), a 1 A charge current may be too high. Check the cell's datasheet for its maximum charge current.
Status LEDs
Most modules have two LEDs: one shows charging (often red) and one shows done (often blue or green). Colours vary by maker, so check your module.
Charging while the project is running
If your project draws current from OUT while the TP4056 is charging, the charger cannot tell the difference between the cell and the load. With a heavy load, it may never see the current drop and never finish charging. For small, low-current projects this is usually fine. For heavy or always-on loads, use a proper power-path or UPS-style module designed for "charge and use at the same time".
Getting 5 V or 3.3 V from one cell
A single cell gives about 3.0 V to 4.2 V during use, which is not 5 V and not a steady 3.3 V.
- For 5 V boards (Arduino Uno and many sensors), use a boost converter module after OUT+/OUT−.
- For 3.3 V boards (ESP32), use a low-dropout regulator or a board designed to run from a single lithium cell.
Our companion guide, Powering Arduino Projects: USB, 9 V, Buck Converter (LM2596) and Regulators, explains regulators and converters in detail.
Troubleshooting
Scroll sideways to see all columns.
| Symptom | Likely cause | Fix |
|---|---|---|
| Charging LED never changes to "done" | Load drawing current during charge, or a worn cell | Disconnect the load and test again; retire a cell that never completes |
| No LEDs at all | No 5 V input, or a bad USB cable | Try another charger and a data/charging cable |
| Module very hot | High charge current, weak airflow | Normal warmth is expected; if too hot to touch, lower the charge current or improve airflow |
| Project switches off early | Protection cut-off or cell nearly empty | Charge the cell; check cell health |
| Project does not power on after a short | Protection tripped | Remove the short; on many modules, connecting the charger resets protection |
| Cell gets hot while charging | Damaged or faulty cell | Unplug immediately if safe, move it away from flammables, and stop using that cell |
FAQ
Is it safe for students to use 18650 cells?
Yes, if you follow the rules: protected cells, proper holders, a correct charger, no damaged cells, and no unattended charging. Younger students should work with a teacher or parent.
Can I charge an 18650 with my phone charger directly?
No. A phone charger provides 5 V; the cell needs a lithium-ion charger circuit such as a TP4056 module between them.
Can I use one TP4056 for my 2-cell robot pack?
No. A TP4056 charges one cell only. Use a charger made for 2-cell series packs with balancing, or remove the cells and charge each one separately. See our robot motors and batteries guide for pack choices.
How do I check a cell's voltage?
Use a multimeter on DC volts, red probe on positive and black on negative, without shorting the probes together. Our multimeter guide explains the settings.
What projects use one 18650 and a TP4056?
Portable sensors, small IoT nodes and solar-charged gadgets. Try pairing it with our solar tracker build for a solar energy project, always keeping the lithium cell behind a proper charger.

Know Your Components: 18 Electronic Components, Their Types, Symbols and Units
Beginner guide to 18 electronic components: resistor, capacitor, diode, LED, transistor, MOSFET, regulator and more. Types, symbols, units and mistak…

How to Read a Datasheet in 5 Minutes (Beginner Guide)
Learn to read any electronics datasheet fast: absolute maximum ratings, operating conditions, electrical characteristics, pinout and typical applicat…

Arduino vs ESP32 vs Raspberry Pi: Which Board for Your Project?
Arduino Uno, ESP32 or Raspberry Pi? Compare logic voltage, Wi-Fi, OS, real-time control and power, then pick the right board for 10 common projects.