 Electro
MQTT with ESP32: Send Sensor Data to Mosquitto and a Node-RED Dashboard
Publish DHT11 readings from an ESP32 over MQTT to your own Mosquitto broker, then build a Node-RED gauge and chart. Topics, wildcards and security explained.
On this page
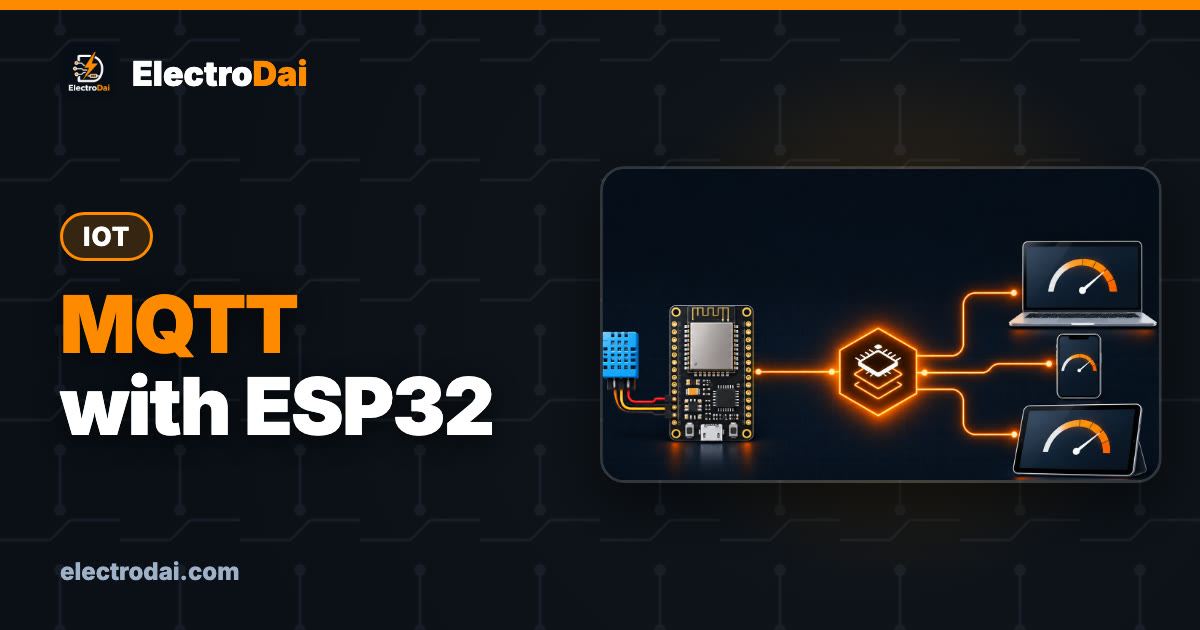
A web server on an ESP32 is a great first IoT project, but it has a limit: every phone or laptop has to ask the ESP32 for data. With five sensors and three screens, that gets messy fast. Real IoT systems usually use MQTT instead: one sensor publishes its data once, and any number of screens receive it.
In this guide, an ESP32 reads a DHT11 temperature and humidity sensor and publishes the values to your own Mosquitto broker. Node-RED then shows them on a dashboard with a gauge and a chart. It is a strong base for BE and BSc CSIT IoT projects.
MQTT in 30 seconds
MQTT has three roles:
- Broker: a server program in the middle. It receives messages and passes them on. Mosquitto is a popular open-source broker.
- Publisher: a device that sends messages to a topic, for example
home/room1/dht. Our ESP32 is a publisher. - Subscriber: anything that asks the broker for a topic. Node-RED, a phone app, or another ESP32 can subscribe.
Publishers and subscribers never talk to each other directly. They only know the broker's address and the topic name. That is why "one sensor, many screens" is easy.
Topics are like folders
Topics use / to make levels, just like folders:
home/room1/dht
home/room1/light
home/kitchen/gas
farm/tank1/level
Subscribers can use two wildcards:
Scroll sideways to see all columns.
| Wildcard | Meaning | Example | Matches |
|---|---|---|---|
+ |
Exactly one level | home/+/dht |
home/room1/dht, home/room2/dht |
# |
Any number of levels (only at the end) | home/# |
Everything under home/ |
Plan your topic names early and keep them lowercase and consistent. Changing them later means changing every device and dashboard.
What you need
Scroll sideways to see all columns.
| Item | Qty | Notes |
|---|---|---|
| ESP32 DevKit | 1 | ESP32-WROOM-32 based |
| DHT11 sensor module | 1 | 3-pin module with pull-up resistor on board |
| Breadboard and jumper wires | 1 set | |
| A computer or Raspberry Pi for the broker | 1 | Linux, Windows or Raspberry Pi OS |
| Wi-Fi router | 1 | ESP32 and broker on the same network |
Wiring
The DHT11 works from 3.3 V, so power it from the ESP32's 3V3 pin. That keeps its data signal at a safe 3.3 V level for the ESP32.
Scroll sideways to see all columns.
| DHT11 module pin | ESP32 pin |
|---|---|
| VCC (+) | 3V3 |
| DATA (out) | GPIO 4 |
| GND (−) | GND |
If you use a bare 4-pin DHT11 without a module board, add a 10 kΩ pull-up resistor from DATA to 3V3. For the basics of this sensor, see our DHT11 weather station with I2C LCD.
Step 1: Install Mosquitto
On Ubuntu, Debian or Raspberry Pi OS:
sudo apt update
sudo apt install mosquitto mosquitto-clients
On Windows, download the installer from the official Mosquitto website and install the clients too.
Recent Mosquitto versions only accept connections from the same computer until you configure a listener. Create a config file, for example /etc/mosquitto/conf.d/local.conf:
listener 1883
allow_anonymous false
password_file /etc/mosquitto/passwd
Create a user and restart the broker:
sudo mosquitto_passwd -c /etc/mosquitto/passwd esp32user
sudo systemctl restart mosquitto
Find the broker computer's local IP address (hostname -I on Linux, ipconfig on Windows). The ESP32 will connect to that IP on port 1883.
Step 2: Test with two terminals
Before touching the ESP32, prove the broker works. In terminal 1, subscribe to everything under home/:
mosquitto_sub -h localhost -t "home/#" -v -u esp32user -P yourpassword
In terminal 2, publish a test message:
mosquitto_pub -h localhost -t "home/room1/test" -m "hello" -u esp32user -P yourpassword
Terminal 1 should print home/room1/test hello. If it does, your broker is ready.
Step 3: ESP32 code
Install two libraries from the Arduino IDE Library Manager: PubSubClient (by Nick O'Leary) and DHT sensor library (by Adafruit, which also asks for the Adafruit Unified Sensor library).
// ESP32 DHT11 -> MQTT publisher - not compiled yet
#include <WiFi.h>
#include <PubSubClient.h>
#include <DHT.h>

const char* WIFI_SSID   = "YourWiFi";
const char* WIFI_PASS   = "YourPassword";
const char* MQTT_HOST   = "192.168.1.50";   // your broker's IP
const int   MQTT_PORT   = 1883;
const char* MQTT_USER   = "esp32user";
const char* MQTT_PASS   = "yourpassword";
const char* TOPIC       = "home/room1/dht";

const int DHT_PIN = 4;
DHT dht(DHT_PIN, DHT11);

WiFiClient wifiClient;
PubSubClient mqtt(wifiClient);
unsigned long lastSend = 0;

void connectWiFi() {
  WiFi.begin(WIFI_SSID, WIFI_PASS);
  while (WiFi.status() != WL_CONNECTED) {
    delay(500);
    Serial.print(".");
  }
  Serial.print("\nWi-Fi OK, IP: ");
  Serial.println(WiFi.localIP());
}

void connectMQTT() {
  while (!mqtt.connected()) {
    Serial.print("Connecting to MQTT... ");
    String clientId = "esp32-room1-" + String((uint32_t)ESP.getEfuseMac(), HEX);
    if (mqtt.connect(clientId.c_str(), MQTT_USER, MQTT_PASS)) {
      Serial.println("connected");
    } else {
      Serial.print("failed, state=");
      Serial.println(mqtt.state());
      delay(3000);
    }
  }
}

void setup() {
  Serial.begin(115200);
  dht.begin();
  connectWiFi();
  mqtt.setServer(MQTT_HOST, MQTT_PORT);
}

void loop() {
  if (WiFi.status() != WL_CONNECTED) connectWiFi();
  if (!mqtt.connected()) connectMQTT();
  mqtt.loop();                                  // keep the connection alive

  if (millis() - lastSend > 10000) {            // every 10 seconds
    lastSend = millis();
    float t = dht.readTemperature();
    float h = dht.readHumidity();
    if (isnan(t) || isnan(h)) {
      Serial.println("DHT read failed");
      return;
    }
    char payload[64];
    snprintf(payload, sizeof(payload), "{\"t\":%.1f,\"h\":%.0f}", t, h);
    mqtt.publish(TOPIC, payload);
    Serial.print("Sent: ");
    Serial.println(payload);
  }
}
Keep the mosquitto_sub terminal open. Every 10 seconds you should see a line like home/room1/dht {"t":24.0,"h":55}.
Note that the DHT11 is a slow, basic sensor. Reading it more often than about once every second or two gives errors, and 10 seconds is plenty for room temperature.
Step 4: Node-RED dashboard in four kinds of nodes
Install Node-RED by following the official Node-RED installation guide for your system (on a Raspberry Pi there is an official install script). Open it in a browser at http://<computer-ip>:1880.
Install a dashboard: in the menu, open Manage palette, search for @flowfuse/node-red-dashboard (Dashboard 2.0) and install it. The older node-red-dashboard package is no longer maintained.
Build this flow:
Scroll sideways to see all columns.
| Node | Setting |
|---|---|
| mqtt in | Server localhost:1883 (add the username and password in the Security tab), topic home/room1/dht, output "a parsed JSON object" |
| change (temperature) | Set msg.payload to msg.payload.t |
| gauge | Label "Temperature", range 0 to 50, units °C |
| chart | Line chart, label "Temperature" |
Wire mqtt in → change → gauge, and also change → chart. Add a second change node (msg.payload.h) with its own gauge for humidity. Click Deploy, then open the dashboard at http://<computer-ip>:1880/dashboard. Open the same address on your phone (on the same Wi-Fi) and you have two screens showing one sensor.
Public test brokers are public
You will find free public MQTT test brokers online. They are useful for a quick test, but anyone can subscribe to your topics and read your data, and anyone can publish fake data to them. Never send personal data, passwords or anything that controls real devices through a public broker. For your project, use your own broker with a username and password, as above. For anything on the internet, also learn about TLS encryption before deploying.
HTTP vs MQTT: which one?
Scroll sideways to see all columns.
| HTTP (web server or API) | MQTT | |
|---|---|---|
| Pattern | Request and response | Publish and subscribe |
| Best for | Simple control pages, one device, forms | Many sensors, many screens, live updates |
| Connection | Opens per request | Stays connected |
| Needs | Nothing extra | A broker |
| Good first project | ESP32 web server LED control | This guide |
Pick by your project, not by fashion. In a viva, being able to explain this choice is worth more than the choice itself.
Troubleshooting
Scroll sideways to see all columns.
| Symptom | Likely cause | Fix |
|---|---|---|
state=-2 repeatedly |
ESP32 cannot reach the broker | Check broker IP, port 1883, same network, firewall on the PC |
state=5 |
Not authorised | Check username and password; check password_file path |
| Broker works locally but not from ESP32 | No listener 1883 line |
Add the listener config and restart Mosquitto |
| "DHT read failed" | Wrong pin, loose wire, reading too fast | Check wiring; keep 2 s or more between reads |
| Node-RED gauge shows nothing | Output not parsed as JSON, or wrong property | Set "a parsed JSON object"; check msg.payload.t |
| Messages stop after a while | mqtt.loop() not called often |
Avoid long delay() calls in loop() |
| Two ESP32s keep disconnecting each other | Same client ID | Give each device a unique client ID |
FAQ
Do I need the internet for this?
No. The ESP32, broker and dashboard can all run on your home or lab Wi-Fi without internet access.
Can I use a Raspberry Pi as the broker?
Yes. A Raspberry Pi is a common choice because it can run Mosquitto and Node-RED together and stay on all the time.
Can the ESP32 also receive commands over MQTT?
Yes. Subscribe to a topic such as home/room1/led/set with mqtt.subscribe() and a callback function, then switch an LED when a message arrives.
How do I save battery on an MQTT sensor?
Combine this with ESP32 deep sleep: wake, connect, publish once, sleep. The ESP32 Deep Sleep guide on ElectroDai explains how.
Is Blynk or MQTT better for a project?
Blynk is quicker to set up and works well for phone control. MQTT gives you full control and is closer to how industrial IoT works. Try the ESP32 Blynk dashboard too and compare.

TinyML on ESP32 with Edge Impulse: Your First On-Device Model
Train a gesture recognition model with Edge Impulse and run it on an ESP32 with an MPU6050. Data collection, training, int8 deployment and testing.

ESP32-CAM Getting Started: Upload, Flash LED and Motion Photo
Upload code to the ESP32-CAM with a USB-serial adapter, fix brownout and Connecting errors, use the GPIO4 flash LED, and take a PIR motion photo.

Landslide Tilt Warning Prototype with MPU6050 and LoRa (Learning Build)
Build a learning prototype that detects tilt with an MPU6050 on an ESP32 and sends alerts over LoRa to a gateway. Wiring, code, testing and limits.